Blade Working Gun Construction
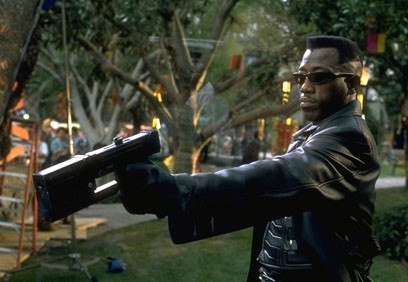
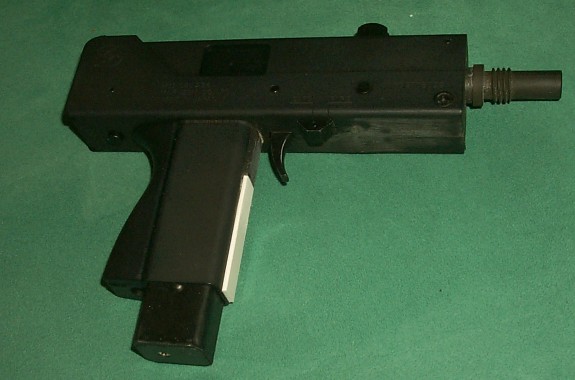
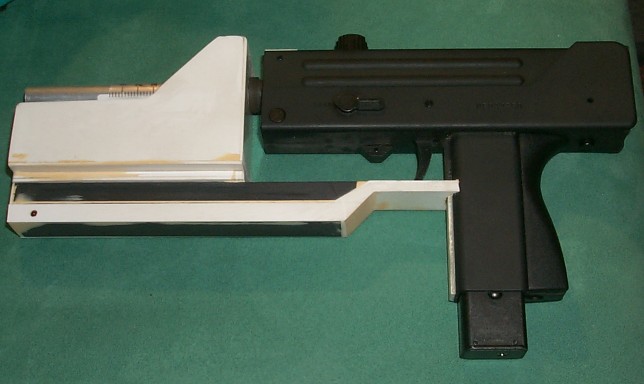
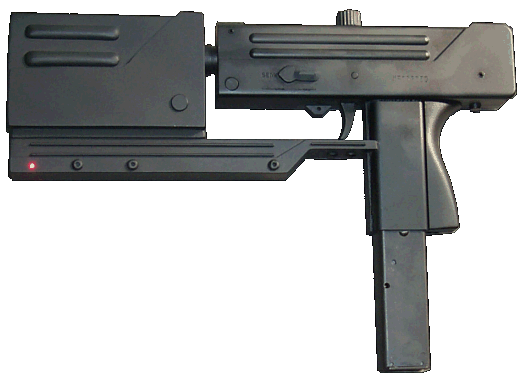
When I got my original rubber stunt gun prop from Blade, I wanted to cast it and add a little more detailing. I soon realized that this was the wrong start, because there was too much work to put into it. So I tried to find out on which real gun Blade's vampire killer was based on and soon I found out that it was an Ingram Cobray M10/11. II asked a friend from Japan (thanks Mune!) if he could find me a 6mm gas blowback airsoft gun and he did! Here you can see how I converted the standard M11 sidearm (...) to Blade's silver bullet firing weapon.
Features:
Gas blowback function
fires 6mm bb pellets
semi or autofire
tracer unit
short mag holds 20, long mag holds 40 rounds
firing distance - ca 35 meters - leds can be activated with a small hidden switch
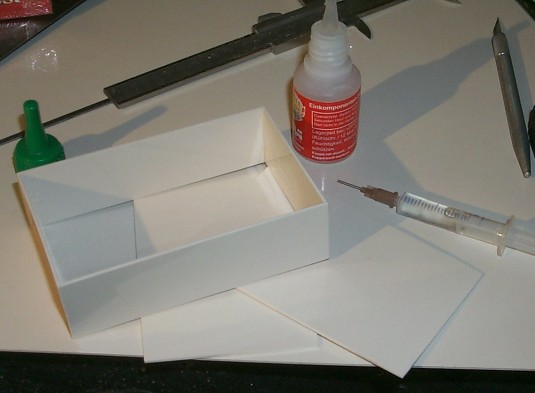
Materials used: Plastic sheets (0.2 - 1.5mm), aluminum barrel, auto body putty, superglue, zip kicker, different screws, plastic strips, hot glue, wood glue, plastic syringe, 2 leds, wire, 2x1.5 volt mignon batteries, battery holder, switch, copper wire, super sculpey, miliput, liquid latex, 1K plastic primer from Revell, Herberts flat black spray
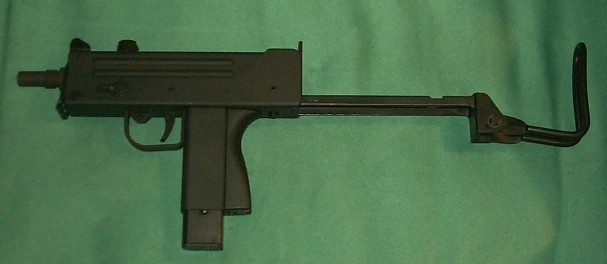 Ingram Cobray M11 gas blowback by Maruzen
 Constructing the body out of ABS plastic sheets
I used the measurements from the original Blade rubber stunt gun.
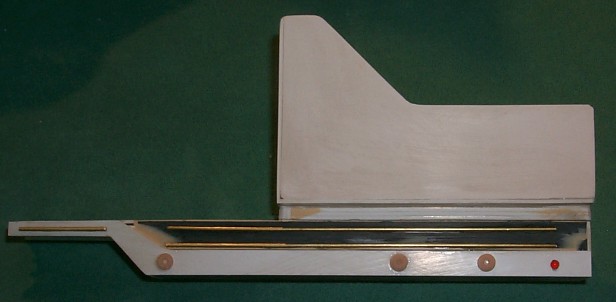
 Constructing supporter
I found plastic strips with the exact measurements as on the real gun. These were used for constructing the supporter which will later connect the main body and the front body.
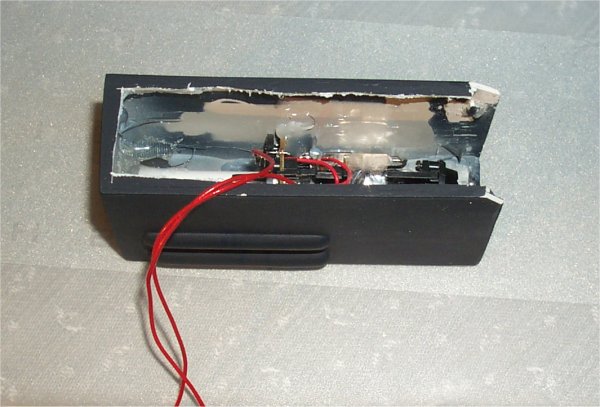
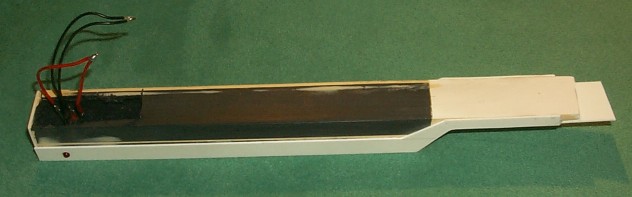 Supporter wiring
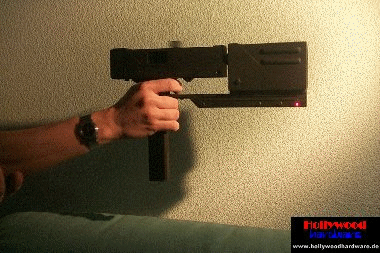
When the supporter basic body was almost finished, I decided to add the leds which you can see in the firing scene after Blades's jump from the window of the hospital.
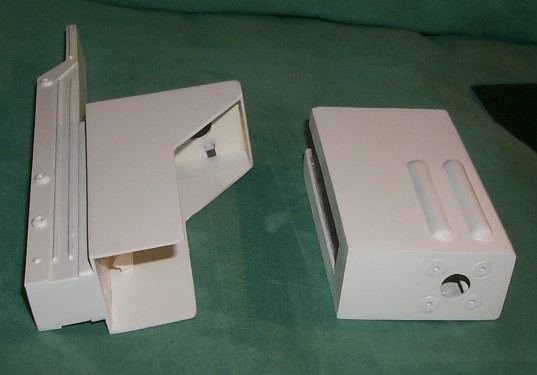
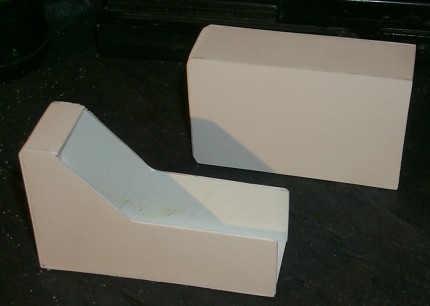 Housing and front body
The housing of the front body had to be built separate, because I would have to change the batteries from time to time. The front body fits into the shell and is holded by 2 big magnets
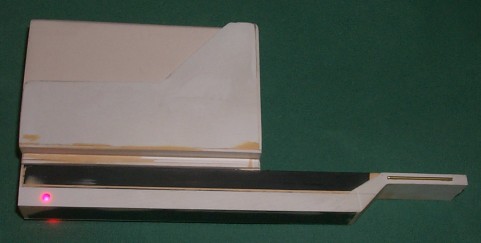 Test fitting
Test fitting front body shell on supporter and checking led brightness
 Gun modifications
The trigger protector and the front and back targeting aids had to be removed. The small strip behind the trigger had to be lengthened, as had the welding line (I used miliput on that).
 Test fitting 2
Again, test fitting was necessary. Here you can see the sculpted welding line, if you look closely. The barrel was lengthened using an aluminum pipe and a piece of a plastic syringe for additional strength.
 Detailing
Most of the detailing was done by Simone. She sculpted the screws, which I could not get anywhere, added the small copper wires and helped me all the time, when I was getting nervous...
 Applying primer
After all detailing was done, sharp edges were sanded, auto body putty was applied where needed and liquid latex was used on the leds, the hole thing was covered with two light coats of primer (I used Revell plastic primer, because it adheres well to abs and other materials). It was again sanded with a 800 grid paper and primered again.
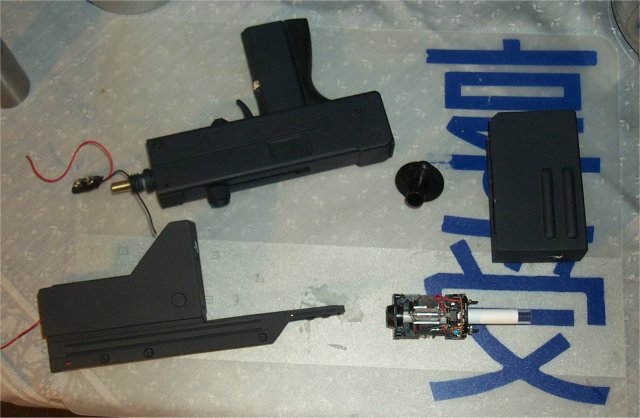 Adding the tracer unit
The gun turned out nice, but not good enough for me. I decided to take the artist's liberty and add a tracer unit to it.
You can see it removed from the original housing in the lower right corner.
 Inserting the unit
Some plastic pieces had to be removed to make the unit fit in the housing. It was then glued into place and the gun was assembled.
 Painting
All components were then disassembled again, masked with tape and liquid latex and sprayed with Herberts flat black
(that fits the original Blade gun best). After that, the gun was assembled again and - THAT'S IT! I am thinking of weathering it...
The whole process took about 32 hours. Please mail your impressions!
Small animation of the gun in action!